Gilding For Absolute Beginners
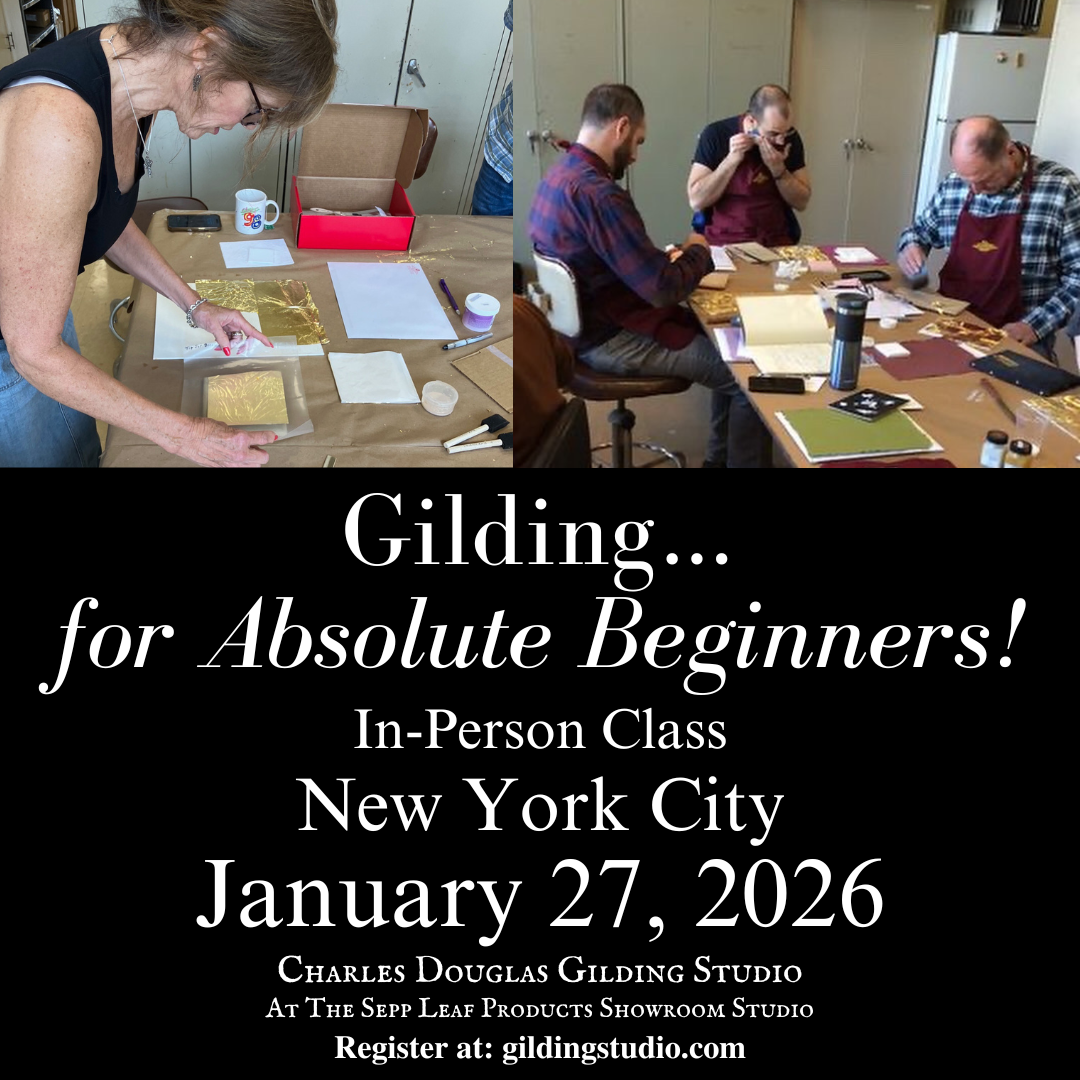
A Day of Gilding for Beginners in new York City!
We All Need To Start Somewhere…
Sometimes when we begin something new we’ll wonder to ourselves ‘where do I begin?’. As I was considering this about the students I speak with who are interested in learning but have little idea how to begin I decided that I would create a gilding class where we start off from the absolute beginning which finally lead to this new class, taking its place among more advanced studies in traditional water gilding, verre églomisé, and the discovery of ancient mordants.
While planning this out I saw that the class would need to begin from a point of ease, where handling the materials can introduce the student to the art of gilding without it being overly challenging, and using a contemporary mordant, or adhesive, that is water-based and therefore easy to cleanup. This provided the framework to structure the class - a short course of study, once a week for four sessions, designed for students who have little to no gilding experience and who can feel comfortable knowing that their class will be filled with like-minded classmates, a class ‘…for Absolute Beginners’!
We Start With An Easy Water-Based Adhesive
The added benefit of working with a water-based mordant is that it’s an acrylic emulsion which means that although it cleans up with soap and water it eventually becomes permanent. It also has other working characteristics which are proving to be very beneficial in modern gilding such as extraordinary flexibility making it a good option for use on canvas for painters as well as on leather and just about any non-porous or semi-porous material. It’s also an excellent mordant for the new student due to it’s quick ability to come to tack in about 10-15 minutes while remaining in the tacky stage, or open, for many hours (actually I have found it to be many days!). So this removes the stress to move quickly leaving students to focus on learning to handle the leaf.
Which brings us to…the leaf. I’m a big believer that if you wish to learn to gild with genuine gold leaf then you should begin straightaway because the heavier feel of the Base metals we also gild with - brass and aluminum - are not nearly as thin and malleable as genuine gold leaf and could even make it more difficult to learn to handle gold leaf because of a sense of feel between the precious and non-precious metals, almost similar to muscle memory.
From Brass Leaf…To Gold!
However, this said, I think it’s useful for the beginning student to first become acquainted with the concept of gilding by initially working with the non-precious metals, focusing on how to create a non-porous surface to gild upon when using the mordant method of gilding, watching how leaf behaves with a tacky mordant, the drying of the mordant size, the required tack before laying the leaf, and smoothing the gilding in the end. These are all concepts which the student needs to learn and therefore may be better served without the added difficulty of learning how to handle the much thinner 23k gold leaf.
These Base metals include two forms: Brass Leaf which is sold as and referred to by different names including Imitation Gold, Composition Gold, Dutch Metal, Gold Metal Leaf; and Aluminum which is referred to as Imitation Silver and Silver Metal Leaf.
The Methods Of Gilding
There are two methods of gilding wood: Water Gilding and Mordant Gilding and these are the two methods we focus on during the Absolute Beginner class with the greater emphasis on Mordant gilding. Mordant is the term used in gilding that represents a Size or Adhesive which can be either aqueous in nature or Oil- Based. The aqueous sizes include such ancient vegetal mordants as garlic juice (Ilinocopia), fig juice, gum ammoniac, gum arabic or any number of the contemporary acrylic sizes such as the acrylic emulsion sold as water-based adhesive from Sepp Leaf Workshop, Dux, and other brands such as Mona Lisa and Wunda Size. Other acrylic mediums include the various selections from Kölner including Miniatum, Miniatum Ink, and Instacoll. The oil-based mordants are oil varnishes which are categorized as either Quick Size or Slow Dry Oil Size which relate to how fast they come to Tack and how long they remain Open which means how long the oil size remains tacky enough to be gilded.
Water gilding is a complex process which involves preparing a rabbit skin glue (RSG) solution, gesso which is made with RSG, calcium carbonate or calcium sulphate, and water, and the preparation of Clay Bole which is a creamy clay mixed with either RSG or Gelatin and applied over the gesso.
Traditional Water Gilding requires an absorbent porous surface and produces a beautiful Finish which glows brightly when burnished with an agate stone burnisher. For a more detailed description of the process readers will enjoy the Blog on this ancient method of gilding in the Post Traditional Water Gilding for Panels…From Pastiglia to Sgraffito.
Our Focus On Mordant Gilding
Unlike Water Gilding, Mordant Gilding requires a non-porous or semi-non-porous surface depending upon whether the mordant used is aquaous or oil-based. Oil Size requires a completely non-porous surface so that the oil will sit on top of the surface to be gilded, otherwise if the surface is absorbent the oil will seep into the surface leaving insufficient size remaining for the leaf to adhere to the object being gilded. Aqueous Mordants such as glair (beaten egg white) or gum ammoniac are often applied over paper that has been weakly sized and therefore will be absorbed slowly into the paper but also allowing the leaf to bond to the surface. These aqueous mordants, however, can also be applied to non-porous glass successfully. Ceninno Ceninni spoke of the use of glair for glass in Il Libro dell’Arte, the 14th c treatise on painting and gilding.
The Online class Gilding For Absolute Beginners is a four-week program where students meet once a week on Zoom for approximately 90 minutes. All sessions are also recorded and students have full access to the recordings for six months after the series ends. There is also a Question and Answer period during each lesson.
Porous And Non-Porous Surfaces
Students are first guided through the concept of porous and non-porous surfaces and how to make a porous surface non-porous, meaning non-absorbent so that the mordant will not be absorbed into the surface. A brick is often a good example for demonstrating this procedure due to the high-porosity of this building material. (I once oil gilded an entire brick fireplace in 24kt gold leaf for an architect client, a good example for turning the ordinary into something unique!)
One simple way of making a porous object non-porous is by simply applying shellac, a topcoat often used in woodworking but used quite frequently in American gilding as a protective topcoat. Coatings of this nature are often not used traditionally in other countries such as Italy and France as any topcoat will dim the brilliancy of the gold leaf. American traditions in gilding seem more accepting of this, an approach which I personally enjoy due especially to its warming capability of bright water gilded gold leaf. For the purpose of sealing a surface, shellac is an excellent vehicle as a method for preparing a surface to make it non-porous.
Paint As An Undercoat For Gilding
Students are also guided in the understanding of the importance of a color under the metal leaf, whether gold, silver, brass, or aluminum. The thinner the leaf the greater the tendency that the undercoat color will inform the overall tonality of the leaf. Genuine gold leaf, white gold, and silver are the most affected by color undercoats due to the thinness of the leaf, especially of the gold which is somewhat transparent. But even this thin gold leaf will allow an object to appear as solid gold once properly gilded.
To seal a surface and also empart a color ground for gilding, an acrylic or oil-based paint are successful undercoats and are therefore a better choice than clear shellac since paints will also provide color and will give a little smoother surface as a ground for the leaf.
The conversation of surface preparation continues because even though the basic requirement for proper mordant gilding is creating a non-porous surface there is still the question of whether the existing texture of the sealed surface is sufficient for creating beautiful gilding. This is where we reach the point of craft versus art, the craft represented by making the surface non-absorbent (i.e. shellac, paint undercoat) versus how the gilding looks in the end.
A non-porous surface does not necessarily make the gilding look its best, it simply allows the gilding to take place: the surface is made non-absorbent, the mordant size is applied to the sealed surface, and the leaf is applied once the mordant reaches the proper tack. If a tarnishable metal leaf was used then it will need to be given a topcoat of shellac or varnish for protection but it can then be considered complete. But is it enough? Does the gilding appear the way we envision it?
The Cause For Gesso
This leads the class to the benefits of gesso, which in traditional gilding involves rabbit skin glue, water, and most often calcium carbonate. Its use on wood is intended to fill the grain so the gilded object appears as solid gold, a concept that goes all the way back to the Early Egyptians. It is up to the student artist to decide whether gesso is necessary or even desired as there are cases where a textured surface may be preferred and therefore an artistic decision is needed.
Traditional gesso is optional when working with the mordant gilding method but it can impart a very smooth surface for gilding and is very useful for picture frames, furniture, and architectural elements gilded in this way. It is most often used for Traditional Water Gilding, however, as it is necessary to help produce a brilliant shine in the gold or silver leaf, working in tandem with the cushioning effect of the clay bole that is applied to the sanded gesso as the final undercoat of the gilding.
The recipe for making traditional gesso is discussed with the students of the Absolute Beginner’s class and is made available for further self-study. A Masterclass in the preparation of traditional gesso is available generally twice a year as part of the gilding program at Charles Douglas Gilding Studio.
Handling Genuine Gold Leaf
One of the major areas of study during the Gilding for Absolute Beginner’s class is the study of handling genuine 23k loose Gold Leaf. This high karat leaf from Manetti in Florence, Italy is chosen for the class. The term loose is used to differentiate it from the Patent form of gold leaf which is lightly adhered to a backing paper with a light wax coating. Students are shown in class how to use the loose form of gold leaf as it’s more flexible in how it can be used, whether on flat surfaces or in the tiniest crevices of the detailed architecture often found on frames, furniture, or intricate carvings where Patent leaf would be inappropriate due to the presence of the backing paper.
It is an important aspect in each of the gilding courses that students learn to use the gilder’s tools: the gilder’s pad, knife, and ‘tip’ - the thin squirrel or sable-haired brush used by the gilder to pick up the gold or silver leaf from the pad and place it on the object being gilded.
Topcoats And Antiquing
The final topic covered in the Gilding for Absolute Beginners class is applying the shellac topcoat as a protective layer to the gilding and creating a simple patina to the gilding to create an aged or antiqued appearance. The patina is created by preparing a wash made by adding water to a non-toxic raw umber casein paint. The paint is thinned and brushed on to the gilded surface. Once dry, the removable casein is then buffed by hand to reveal a little of the underlying brilliancy of the leaf and re-sealed with clear shellac. Once the shellac is dry the overall gilded object is buffed with cheesecloth dabbed with rottenstone, a very fine polishing powder which cuts the glossy appearance of the shellac and pulls the look of the finished gilding together. Sometimes a little of the rottenstone is left behind in some of the crevices if the object is ornate, offering the appearance of natural accumulation of dust; otherwise, it can be dusted off completely for a cleaner look.
A student can produce many objects of varied beauty and creativity working within this realm of mordant gilding. For the purpose of growth as a gilder and for providing more creative options, a further course of study in Traditional Water Gilding would be a natural next step, taking the complexity of gilding further…one step at a time. ~
For further information on the gilding classes offered go to the page Gilding Class Schedule and Information or visit the Book A Class page to sign up for a class. Plus, if an Online Class works for you, consider the Upcoming Beginner’s Class this December 16! 2025 - January 6, 2026!