Posts tagged Water Gilding
Water Gilding

Methods and Techniques of the Italian Renaissance

Prepare Your Own Size, Gesso, Bole, and Gild in Genuine 22k Gild Leaf!

Traditional Water Gilding

Traditional Water Gilding is the oldest of all the gilding methods, with the origins of gilding dating back over 4,000 years ago to Northern Africa. The sheets of what we think of today as gold leaf were in its earliest form more of a thick foil which would be pinned to an object for ornamentation, often with Spiritual significance.

Very little has changed over the years throughout the history of Traditional Water Gilding. A surface foundation we call gesso today is still comprised of an animal-based glue and filler - rabbit skin glue and calcium carbonate or calcium sulfate (sulphate in the British spelling) - with a clay that is mixed with the glue and applied for color over the white gesso informing the tonality of this thin metal while also providing a cushion underneath the gold to aid in its burnishing. Today we usually use agate stones in various shapes for burnishing gold and silver leaf which makes the leaf shine and compresses it into the surface making it more durable in its bond to the surface. Historically, however, a dog’s tooth was used for burnishing as described by Cennini in his late 14th Century Treatise Il Libro dell’Arte - The Craftsman’s Handbook. Two translations are available, the earliest by Daniel Thompson (1954 is the first Publication by Dover) with the newest (2015) by Lara Broecke. There are other earlier translations of this intriguing writing of Cennino d’Andrea Cennini with the intent of each new translation correcting the previous.

One aspect of gilding that has changed throughout its history is the thickness of gold leaf due to the malleable characteristic of gold to be beaten thin, most notably with the progressive use of machinery taking the place of hand hammering, although still used to some degree by the goldbeaters. I was very fortunate to witness this ancient craft of gold beating when I visited the Manetti Gold Beating Factory in Florence where I watched as ribbons of gold were beaten and ultimately cut into 3 3/8 inch squares and packaged for delivery. A wonderful experience to be detailed in another story for another day.

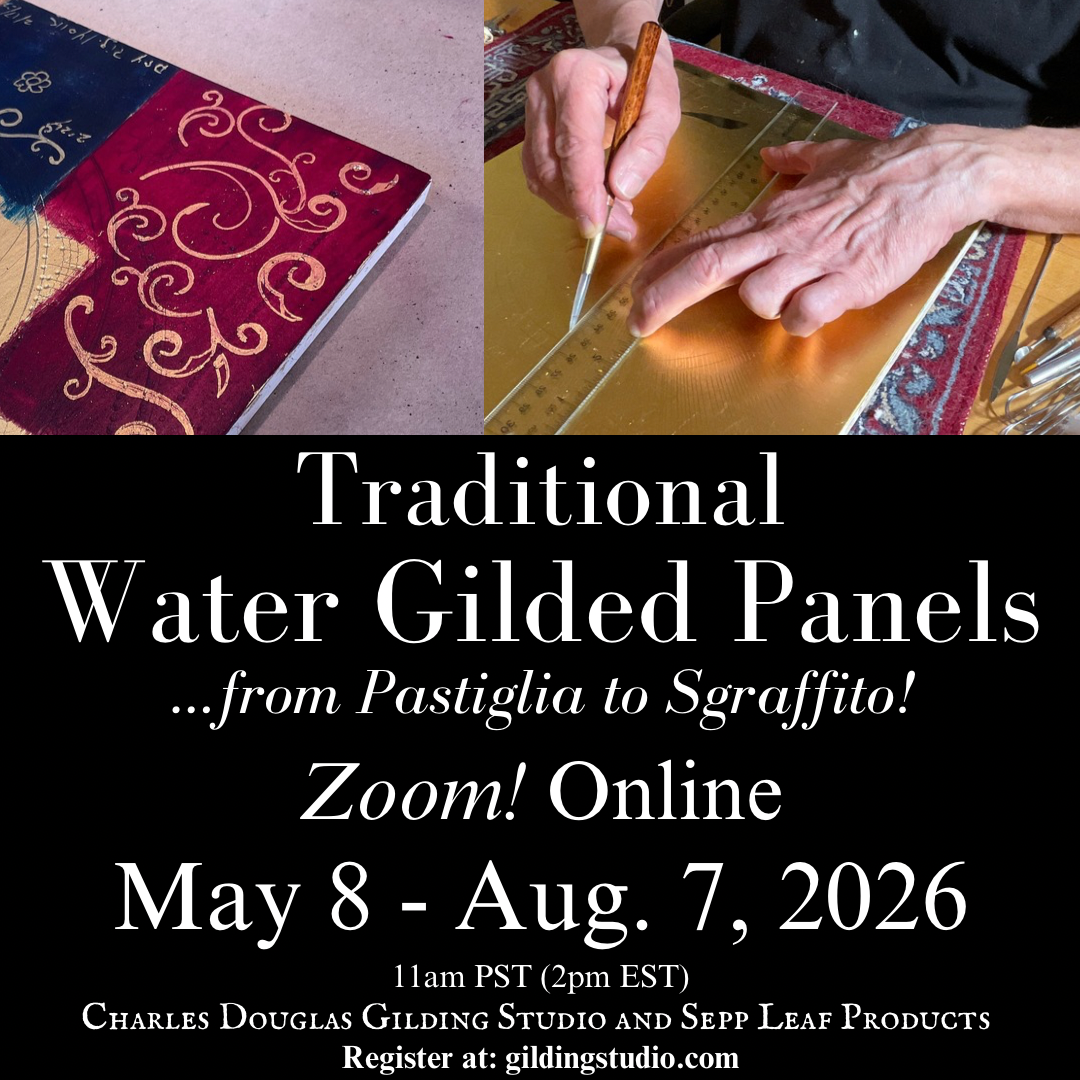
Water Gilded Panels Class…The Method of 13th - 18th Century Florence and Siena

The method of traditional water gilding can be seen on 13th and 14th Century Florentine and Sienese Egg Tempera and Oil painted Panel Paintings, a period which can be viewed as a point of reference for the online gilding class Traditional Water Gilded Panels…The Method of 13th - 18th Century Florence and Siena. Of all the gilding classes offered through Charles Douglas Gilding Studio this is the most extensive, meeting weekly for 12 weeks it includes the embellishment techniques of Punchwork and Incision (Granito), Raised Gesso (Pastiglia), and traditional Egg Tempera Sgraffito. This Online Class as well as the In-Person Water Gilding Workshops are also well-suited for the student of Iconography who share this long history through the Practice of gilding sacred Icons.

To grasp a full understanding of Traditional Water Gilded Panels students are taken through each step of this ancient method which include the following steps:

  • Chamfering the panel’s edges

  • Preparing the 10% Rabbit Skin Glue Size

  • Sizing the Panel

  • Applying and gluing Fabric to the Panel

  • Preparing and applying Hard and Soft Gesso

  • Sanding the Gesso

  • Preparing and Applying Raised Gesso known as Pastiglia

  • Preparing and Applying Clay Bole

  • Gilding in 22k Gold Leaf

  • Burnishing

  • Granito (Punchwork and Incision)

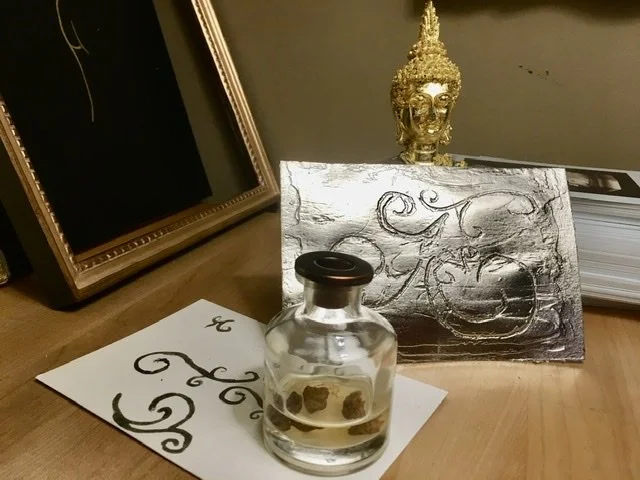
  • Sgraffito, a technique where egg tempera paint is prepared and applied over the gold leaf and designs etched through the paint to reveal the underlying gilding

Gilding Recipes For Gesso and Clay Bole

The recipes for the Rabbit Skin Glue (RSG) Size, Hard and Soft Gesso, and Clay Bole can be downloaded at the Charles Douglas Gilding Studio website under the Materials and Recipes Tab in the Navigation Bar. Students are shown in the online class how to properly prepare all of the materials and the panel for gilding in genuine gold leaf. The gesso recipe was passed onto me many years ago based on an old English approach and later presented to be the best for its stability in a paper Titled Physical Properties of Gilding Gesso by Marion F. Meklenburg from the book Gilded Wood Conservation and History, edited by Deborah Bigelow who I was fortunate to have taken a class with in 1998 on the concept of Toning Gilding which was around the same time as the publication of what remains my favorite reference books on gilding.

During the Water Gilded Panels class students gain an understanding of the principles of how the system of Traditional Water Gilding works for stability of the gilding on wood, adhesion of gold leaf to the clay bole, how the gold leaf is burnished, and how the various decorative embellishments of granito, pastiglia, and sgraffito are performed.

Handling Gold Leaf

Perhaps the most challenging aspect of learning to water gild is the handling of the extremely thin gold leaf which can measure as thin as 1/250,000th of an inch (less than the width of a human hair). Despite the extreme delicate nature of this beautiful and malleable of all metals it can be managed and tamed and with time and correct practice students can become adept at handling leaf. Students who are new to gilding will find handling 22k gold leaf a little easier than the higher kts.

Students are shown how to use the gilder’s main tools - the pad, knife, and ‘tip’, the thin-haired sable or squirrel hair brush used to pick up the gold leaf from the gilder’s pad where the leaf was cut with the gilder’s knife to the desired size off gold leaf with the knife. I also demonstrate cutting small pieces of leaf as tiny as 1mm for spot gilding, the practice of applying small pieces of leaf to spots where the gold may have been missed, generally from either a small air bubble or breakage in the gold.

Gold leaf is subject to various conditions which can be difficult to contend with especially for the beginner - static electricity in the room and on the pad or knife, knicks in the knife, insufficient skin or hair oil which is used to pick up the gold leaf (no, we don’t want static for this, no matter what you read elsewhere!), and often, that slight breeze from someone walking by that blows your leaf right off the table! But in time you’ll learn how to handle each of these situations and I personally guide you in each class that’s offered through demonstrations and discussion due to its importance.

Gilding The Panel

Each session for the Traditional Water Gilded Panels class involves 12 weeks of Study where students gather with me online weekly for 90 minutes. The first hour is dedicated to a specific step in the water gilding process for Panels with the remaining 30 minutes allowed for a Question and Answer period with the students, a dynamic aspect of the online classes where we can explore student’s questions in depth.

The preparation of the 12” x 12” Panel takes the first five lessons, from preparing the Size and Gesso to applying the five layers of silky smooth Clay Bole. We are then ready to begin gilding.

Both Single and Double Gilding are demonstrated in class where Double Gilding is simply applying a second layer of gold leaf over the first which provides for an absolutely fully covered layer of gold over the gessoed panel. The main objective of Double Gilding is to cover any areas where the initial single layer of gold leaf may have small holes from air bubbles, breaks in the leaf where the overall appearance of the gilding would be more uniform in its beauty by Double Gilding rather than simple spot gilding which can sometimes leave ghost images from general touch-ups.

A student’s gilding will become more proficient with time and better leaf-laying skills will leave fewer imperfections but there is sometimes the occasional mishap in water gilding where a second application of gold leaf can provide an overall more attractive appearance. These concepts of spot gilding, single gilding, and double gilding are all discussed and demonstrated during lessons 6-8 where the class is focused on laying gold leaf to the panel.

Burnishing, Granito, Pastiglia, Egg Tempera Sgraffito

…To Be Continued!

Single Gilding Versus Double Gilding

Double Gilding

An object that is double gilded has two layers of gold leaf laid, one atop of the other. This is normally done with the traditional water gilding method and imparts a very deep, golden tone that is generally free from defects in the gilding. Water gilded leaf has a satin tone in its natural state; burnishing the gold or silver leaf brings the metal to a brilliant lustre.

When water gilded leaf is left satin, it's left un-burnished. This means that the leaf not only has a satin tone but is also not compressed into the clay bole that is applied to the underlying gesso such as a gilded picture frame furniture, or other wooden object and therefore bonding of the gold leaf to the surface is somewhat more vulnerable to wear. It has historically always been this way and old water gilded frames and furniture that have unburnished satin areas will likely show more wear than their burnished counterparts. Therefore, I often use additional 10@ RSG (rabbit skin glue) or gelatin in the gilding water for unburnished areas to aid in adhesion. I also sometimes sometimes apply a 5:1 10% Glue to Water wash over the satin leaf for added protection.

Spot and Single Gilding

Single layer water gilding sometimes results in some anomalies ('spots' exposing underlying clay bole from trapped air bubbles or breaks in the leaf) during the process of gilding, many of which can be covered during spot gilding, although if done excessively the result can be somewhat unsightly due to ghost images of these small sections of leaf applied over existing gilded leaf. Double gilding covers all the anomalies that single gilding sometimes leaves behind and is useful when gilding satin areas. It offers a very solid layer of gold leaf.

There are times, though, that the somewhat translucent quality of single water gilding is preferred when developing a satin section, especially when other areas of the water gilded object are rubbed, abraded, or distressed. As an example, a picture frame that is antiqued to some degree can be a little jarring if the sides are a strong solid double gild. It is often aesthetically best if the overall appearance of the gilding presents a sympathetic quality between each of the gilded sections, where no one area is dramatically different in its condition.

The technique of Double Gilding is demonstrated in the Water Gilding for Panels Online gilding class which is discussed on the website page for Gilding Class Information.

A Primer for Aspiring Gilders: Methods, Binders, and Gilding Terminology

What Exactly Is Gilding?

To many of the uninitiated, intrigued by the beauty of gold leaf, one of the first questions I hear concerning gilding is “what makes it stick?”. It’s actually a long answer, depending on the method of gilding, historical reference, and personal choice.

Gilding, which is the application of a metal leaf to another surface is comprised of three main methods: Water Gilding, Mordant Gilding, and Glass Gilding/Verre Églomisé. Water Gilding is used primarily on wood although can also be performed on plaster, hydrocal, and a mould-making material known in the Framing and Furniture world as Compo. Mordant Gilding which includes such adhesive agents as oil size and acrylic emulsion is designed for any non-porous surface from sealed wood and glass to stone and walls. Glass Gilding can be performed on either the front or the back of glass, from mirrors and tabletops to decorative glass sculptures and gilded and painted sceneries of age-worn Grandfather Clocks.

Within these methods lie the techniques used for Byzantine, Russian, and Greek Iconography, Manuscript Illumination, 13th-18th c Florentine gilded panel paintings; the gilded architecture of Cathedrals and Domes and Palaces; the ornate picture frames of French, Italian, Flemish, and early American design; Asian temple woodcarvings, Tibetan metal work; the decorative effects of raised gesso for calligraphy or its use on frames and furniture in the form of pastiglia; the beauty of egg tempera paint over water gilded gold leaf and etched away in a method known as sgraffito; and the gesso treatments of granito. The uses of gilding throughout the centuries seems endless.

Water Gilding

Traditional water gilding generally involves rabbit skin glue and/or gelatin; glass gilding/verre églomisé uses a food grade gelatin for bright gilding or oil size for contrasting matt sections although glair - beaten egg white - can also be used as described by Ceninni in his 15th c Treatise Il libro dell’Arte for religious reliquaries which also leans matt, depending upon the strength. Oil size is a popular bonding medium in mordant gilding alongside other mordants including garlic, gum ammoniac, and contemporary acrylic emulsions. The use of these mordants extend from oil gilded interior and exterior architecture to the application of glair and gum ammoniac for manuscript illumination and bookedge gilding.

Each of these bonding mediums carry their own characteristics and purpose of use. Referred to as Size, many mordants such as oil size and acrylic emulsion (sold as water-based adhesive) are applied topically to a non-porous surface and allowed to dry to a slight tack on which the gold, silver, or other precious or non-precious metal leaf is applied. Both of these adhesive materials are considered mordant gilding. While we often hear of the popular term oil gilding, there is no separate term other than mordant gilding for gilding with acrylic emulsion and despite it being water-based it would be incorrect to refer to it as water gilding, a completely different method of gilding rooted in antiquity dating back over several thousand years.

Traditional water gilding involves a protein binder throughout the process. My method of practice begins with preparing a 10% rabbit skin glue (rsg) solution: 1 part dry granules to 9 parts distilled water. Once the granules soften overnight they are heated in a double boiler until dissolved, the mixture never surpassing 120F to avoid destruction of the enzymes which would affect the adhesive quality of the glue. The wood object to be gilded is then coated with a layer of the heated size and left to dry 24 hours, allowing the wood time to re-stabilize from the hydration.

Rabbit Skin Glue As A Binder

The Rabbit skin glue solution is also used to prepare gilder’s gesso, a combination of 10% rsg, additional water, and calcium carbonate or calcium sulphate which is applied to the sized wood. 10% rsg is also used in the preparation of the clay bole and applied over the gesso. A 10% solution of gelatin can be used for the bole instead of rsg as a matter of preference as it doesn’t require the lengthy soaking time as the rsg granuals.

The term gesso is used to convey foundation or ground. I have recently come to refer to it simply as gilder’s gesso to help differentiate it from other forms of gesso such as oil or acrylic-based. They are all referred to as gesso which can be confusing as the term is shared but the materials that are used in their manufacture are quite different. Although they each form a ground, a painter will use gesso to isolate the canvas from the effects of oil paint while a gilder will apply gesso to wood to fill the grain and in the case of water gilding, to burnish the gold to a high lustre.

During water gilding, the gold leaf is laid over the clay bole once the bole has been sufficiently hydrated with water and alcohol, reactivating the glue in the clay which bonds the leaf to the surface. The leaf is then later burnished to a beautiful brilliancy. Often the gold leaf is left matt in specific sections of the gilded object for contrast to the burnished areas.

Clay bole is obtained as either a dry cone which gilders will then grind or tumble in a ceramic tumbler known as a Ball Mill as I do with water and tumbling stones until creamy or it can be purchased pre-mixed where the clay has already been tumbled and mixed with water. This clay is then combined with a specific amount of dissolved rabbit skin glue or gelatin and applied over the gesso that has been sanded smooth. The clay provides a sympathetic color under the gold or silver leaf and aids in the effectiveness of the burnishing with an agate stone burnisher.

Gilders will often use the terms Clay Bole, Clay, or Bole interchangeably. Intriguingly, this holds true whether the clay bole is in its raw dry cone or pre-mixed state and whether or not it has been combined with the glue size. This is important to note since protein binders such as rabbit skin glue and gelatin have a short shelf life once mixed with water and should never contaminate the raw form of the clay bole which normally sits on the gilder’s shelf as it will turn the container of raw clay rancid and useless. The rabbit skin glue or gelatin should only be used to create what I call prepared bole - the solution of clay, water, and glue which is used while gilding and stored in the refrigerator when not in use.

Protein binders such as rabbit skin glue can last many months in their dry state when stored in a glass container and cabinet but breakdown fairly quickly once combined with water. Depending upon the temperature setting and condition of refrigerators, two weeks is generally a good guideline for maximum life of the prepared glue, whether in the form of the 10% water and glue size, the prepared clay bole, or the gesso. When any of these prepared materials for gilding deteriorate, which could be between 2-4 weeks in the refrigerator, the prepared glue size, clay, or gesso will develop a soft, watery texture and eventually a strong odor if left passed their prime due to the presence of the rsg or gelatin as they are both protein binders and should never be used once deteriorated since the adhesive quality will be greatly diminished.

Mordant Gilding

The method of mordant gilding with either oil size or acrylic emulsion is less time intensive than traditional water gilding although each step is very important to be done correctly to achieve an attractive gild and to avoid any stressful mishaps from wet or pooling size.

Unlike water gilding which requires a porous surface, mordant gilding requires a non-porous surface. Technically, raw wood could simply be given numerous coats of shellac to reduce the porosity on which oil size or acrylic emulsion can then be applied. Once the size dries to a tack the leaf is laid and gently compressed with either a soft pounce pad or light pressure through the thin rouged paper inside the gold leaf booklets or whatever is the gilder’s preferred method for smoothing the leaf. However, although a porous surface can be made non-porous there are other steps a gilder can take to create a more attractive gild than simply gilding over shellac-sealed wood.

I often apply six coats of gilder’s gesso to wood frames and furniture to fill the grain, sand the gesso and apply a Primer and enamel paint as an undercoat before oil gilding, or an acrylic paint as an undercoat for gilding with acrylic-emulsion, providing a nice foundation free of the presence of wood grain while the paint seals the porous gesso and offers an attractive color under the somewhat translucent gold leaf. Other preparatory treatments are often necessary for other surfaces such as metal, especially for exterior work for successful bonding and longevity.

Verre Églomisé

Gilding on glass is a method that I often refer to as Glass Gilding or by the French term Verre Églomisé, named after the 18th c French Dealer and Restorer Jean-Baptiste Glomy (1711-1786) who reintroduced the ancient Roman technique of gilding and painting on the back of glass.

As a weak size made of gelatin dissolved in water is used, some refer to this method as water gilding which I refrain from to avoid confusion with traditional water gilding. The form of gelatin used for glass gilding today comes in the form of a clear, short rectangular sheet with perforated diamond shapes for ease in measuring. Pharmaceutical capsules have also long been used and some gilders prefer these although in either case, the gelatin should be stored in a glass jar in a cool cabinet. Prepared as a water-based mordant it is best to use fresh gelatin as age can affect adhesive quality. A clear, crisp snap of the gelatin ‘diamonds’ is a good indication of fresh quality.

For the beginning gilder it is perfectly good to choose a path of specialization in a particular area of gilding, whether as a water gilder of frames or furniture, a hand-letterer on glass, a manuscript illuminator, or a restorer of gilded antiques. Whether someone chooses to specialize or to become proficient in a variety of methods and techniques it’s beneficial to acquire an overall knowledge of the various forms of gilding, their history and purpose of application. It can be helpful in a business context and in the sense of self as an artist, in one’s confidence, choices, and opportunities that may come along.

For a full listing of classes the full curriculum is currently being added to the Gilding Class Information page. ~

For those interested in studying gilding Charles Douglas Gilding Studio offers both an in-person and Online Classes including studies in Glass Gilding, Verre Églomisé, Mordant Gilding, and Traditional Water Gilding. Visit the website page Gilding Class Information for more detail or go to the Book A Gilding Class page for an up-to-date class schedule and Registration.